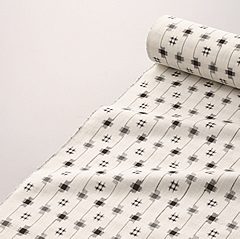
TOKAMACHI Kasuri (Ikat)

Niigata Prefecture

The prevailing theory is that the ikat weaving technique used for Echigo-chijimi fabric became established in the first half of the 18th century.
It wasn't until the late 19th century, after the success of warp ikat weaving, that it began to be applied to silk fabrics. In the early Meiji period, weft ikat weaving also began. During this time, there was remarkable progress in ikat weaving techniques, and the "tsuki-kasuri" (thrusting ikat) technique was also developed. Initially, oil paper, ramie thread, and bamboo leaves were used for the binding threads, but in the Taisho period, cotton thread and flat elastic were used instead.

  • Technology/techniques/raw materials

    Technology/techniques

    1. The fabric must be a kasuri textile woven using one of the following techniques or methods.
    (1) The fabric shall be plain weave with pre-dyed yarn.
    (2) Kasuri yarn shall be used as weft or as both weft and warp.
    (3) The warp threads and weft threads are manually matched to create the ikat pattern.


    2. The dyeing method for the ikat thread shall be by hand-tying or rubbing.


    3. In the case of "Hon-shibo Kasuri," the "ground weft" shall be "Omeshi weft." The yarn used for "Omeshi weft" shall be pre-twisted using a "Hatcho-shiki twisting machine," and then hand-twisted with fabric starch, bracken starch, or other plant-based sizing agents.
    raw materials

    The thread used shall be raw silk, spun silk, or floss silk, or silk thread of equivalent quality.


  • Work scene

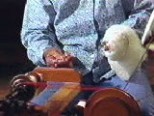
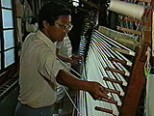
    The process of making TOKAMACHI Kasuri (Ikat) is complex. The raw material is silk, and the ikat patterns are applied to the silk threads. To create the ikat patterns, a ruler is made to transfer the design onto the thread, which is then placed against the thread, marked with ink, and dye is rubbed into the thread using a spatula called a "surikomi-hera." After dyeing the threads, the warp and weft threads are set on the loom, and weaving can finally begin. Weaving is done carefully, while checking the position of the ikat patterns in the warp and weft. Finally, the starch is removed as a finishing touch, and the finished product is inspected before completion.

    Step 1: Design (creating ikat patterns and making rulers)

    Based on the original design or sample, the pattern placement is determined on graph paper to create the ikat pattern, and the exact location of the threads where the ikat will be applied is precisely set. Then, based on that pattern, the warp ikat and weft ikat are separated, and a ruler is created.

    画像をクリックすると動画が再生されます

    Process 2: Twisting and scouring

    Raw silk and spun silk (also called sujiito, a thick thread with many streaks; it is made from a tamamayu, a cocoon produced by two silkworms) are put through a twisting machine and twisted. Twisting makes the strength and thickness of the thread uniform. After that, it is scouring to remove dirt and other impurities.

    Process 3: Hand-stretching

    After sizing to make it easier to handle, the threads are wound onto bobbins or frames using a repetitive machine, and then hand-stretched to the required number and length for each type of warp and weft ikat, according to the design specifications.

    Step 4: Marking and shaping

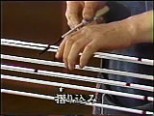
    The warp and weft ikat threads are stretched onto a stretching stand, and the selvage marks on both ends of the ikat ruler, which indicate the woven fabric, are aligned. Then, ink marks are made to indicate the position of the ikat pattern.
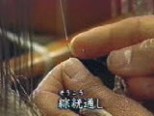
    Additionally, the marked sections of the warp and weft threads are tightly tied with cotton thread or elastic. This prevents the color from lingering in these areas. If the tying is not done properly, the color may fade to the tied sections or result in uneven coloring.

    画像をクリックすると動画が再生されます

    Step 5: Rubbing and dyeing

    Using a rubbing spatula, the dye is thoroughly rubbed into the areas that have been marked with ink. The threads are tied into skeins and dyed together with the ground threads (the parts that are not ikat). After that, the color is stabilized with steam at about 100 degrees Celsius.

    Step 6: Preparation for weaving

    The process differs depending on whether you're working with the warp or weft threads. For the warp threads, the knots are removed and the threads are loosened before being wound onto a reel while checking the pattern. Then, each thread is passed through the heddle holes of the loom, and two threads at a time are passed through the reed. This process is done carefully to avoid mistakes in the order of the threads due to the ikat pattern. The standard number of threads is around 1200. The weft threads are also removed and loosened in the same way as the warp threads before being wound onto a reel frame, placed on a small winding stand, and finally wound onto bobbins for weaving. Finally, the fabric is ready to be woven, and the weaving can begin.

    Step 7: Weaving

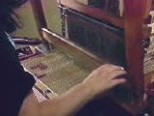
    By preparing the loom's heddles and reed to pass the warp threads, the threads are suspended vertically, creating a path for the weft threads. The weft threads move back and forth through this path, and are woven by being sandwiched between the upper and lower warp threads. For the ikat patterns, the selvage marked during the ikat-making process is examined, and the pattern is precisely aligned, ensuring that not a single thread is misaligned. Finally, the fabric is inspected for stains and weaving irregularities.


overview

Craft item name TOKAMACHI Kasuri (Ikat)
Reading Tokamachigasuri
Classification of crafts fabric
Main Products Kimono fabric, Japanese clothing accessories
Main manufacturing area Tokamachi City, Tsunan Town, Nakauonuma District
Designated date November 1, 1982

contact address

■ Production area association

Tokamachi Textile Industry Cooperative
948-0003
6-1-71-26 Honcho, Tokamachi City, Niigata Prefecture
Cross 10, 4th floor
TEL: 025-757-9111
FAX: 025-757-9116

https://www.tokamachi-orikumi.or.jp/

Features

TOKAMACHI Kasuri (Ikat) is a folk-art style ikat textile that blends traditional beauty with modern sensibilities. Many people appreciate its deep character, including the unique luster of silk and the fine texture of the fabric, and it is widely worn in everyday life as casual wear for going out or as stylish attire at home.

How to make it

The pre-arranged warp and weft ikat threads are stretched on a frame, and while aligning them with warp and weft ikat rulers created according to the design, the threads are printed by alternating movements according to the specified color scheme. Next, the printed areas are tightly tied with cotton thread or flat elastic, and the base color is dyed by immersion dyeing. After the next preparation process for weaving, the warp and weft ikat patterns are woven together by hand.

Please see here for information on traditional craftspeople.

Japanese traditional craftsman
top